Installing an LED flood light is a high-value DIY project that dramatically transforms nighttime visibility. It empowers you to take complete control of your property security and vehicle lighting capabilities. However, tackling this electrical task requires strict adherence to safety standards and a clear understanding of load capacities. Many beginners underestimate the hidden complexities of electrical systems. They often ignore critical waterproofing steps or miscalculate vehicle power draws. This oversight frequently leads to blown fuses, premature diode failure, or dangerous electrical hazards.
This comprehensive guide breaks down the physical installation and wiring logic for both residential property flood lights and heavy-duty off-road vehicle setups. It helps you accurately evaluate installation complexity, identify necessary tools, and recognize safety risks. You will know exactly what to prepare and which pitfalls to avoid before purchasing specific lighting fixtures or auxiliary light bars.
Key Takeaways
Safety Standard: Never bypass the main breaker (for home) or battery disconnect (for vehicles); verify no-voltage with a multimeter before touching wires.
Application Drives the Method: Residential 120V/240V AC installs require junction boxes and weatherproof gaskets; 12V DC vehicle installs require specialized wiring harnesses and relays.
Environmental Ratings Matter: Always verify IP67 or higher waterproof ratings for exterior and off-road applications to prevent premature diode failure from moisture ingress.
Tool Requirements: Basic installations require a multimeter, wire strippers, waterproof wire nuts/connectors, and a drill.
1. DIY vs. Professional Installation: Evaluating Your Readiness
Deciding between a DIY approach and hiring a professional comes down to risk evaluation. You might want to save money on upfront labor costs. However, poor wiring jobs often cause electrical shorts, costly property damage, or voided vehicle warranties. You must honest evaluate your technical comfort level.
When to DIY
DIY installations make sense for straightforward replacement jobs. If you already have an existing exterior fixture, swapping it out for a modern unit is relatively simple. You use the existing wiring, ensuring the new fixture matches the current voltage supply. Vehicle owners can also handle basic plug-and-play accessories. Mounting a standard LED Driving Light becomes manageable when the kit includes a pre-wired relay harness. You simply connect the ring terminals to your battery and route the switch into the cabin.
When to Hire a Professional
Complex jobs require licensed expertise. Never attempt to run brand new AC electrical lines from your main breaker panel. This task requires pulling permits and adhering to strict National Electrical Code (NEC) standards. On the automotive side, professional help is crucial for multi-zone, high-amperage off-road setups. Modern vehicle computers (ECUs) are highly sensitive. A professional will calculate alternator loads and integrate auxiliary fuse blocks to protect factory electronics.
Risk Assessment
Always identify local building codes before starting property modifications. Exterior lights often have height or brightness restrictions. For automotive projects, research your state Department of Transportation (DOT) regulations. Many states restrict the use of auxiliary vehicle lighting on public roads. Covering these legal and technical bases ensures a safe, compliant project.
2. Technical Prerequisites and Hardware Evaluation
Successful installations start long before you pick up a drill. You must understand the technical specifications of your chosen equipment. Ignoring manufacturer datasheets leads to poor performance or immediate hardware failure.
Understanding Datasheets
Review the manufacturer datasheet to find critical operational thresholds. Check the acceptable voltage range. Check the minimum and maximum operating temperatures. Most importantly, distinguish between actual wattage and equivalent wattage. Marketing materials often highlight an "equivalent" halogen brightness. You must calculate electrical loads using the actual LED power draw.
Standard Wiring Color Codes
Wiring colors differ entirely between residential AC systems and vehicle DC systems. Mixing them up causes catastrophic shorts. The table below outlines standard US configurations.
System Type
Hot / Positive Wire
Neutral / Negative Wire
Ground Wire
AC Property (US 120V)
Black (Live/Hot)
White (Neutral)
Green or Bare Copper (Earth/Ground)
DC Vehicle (12V)
Red (Positive)
Black (Negative/Ground)
Black (Chassis Ground)
Verifying Build Quality for the Environment
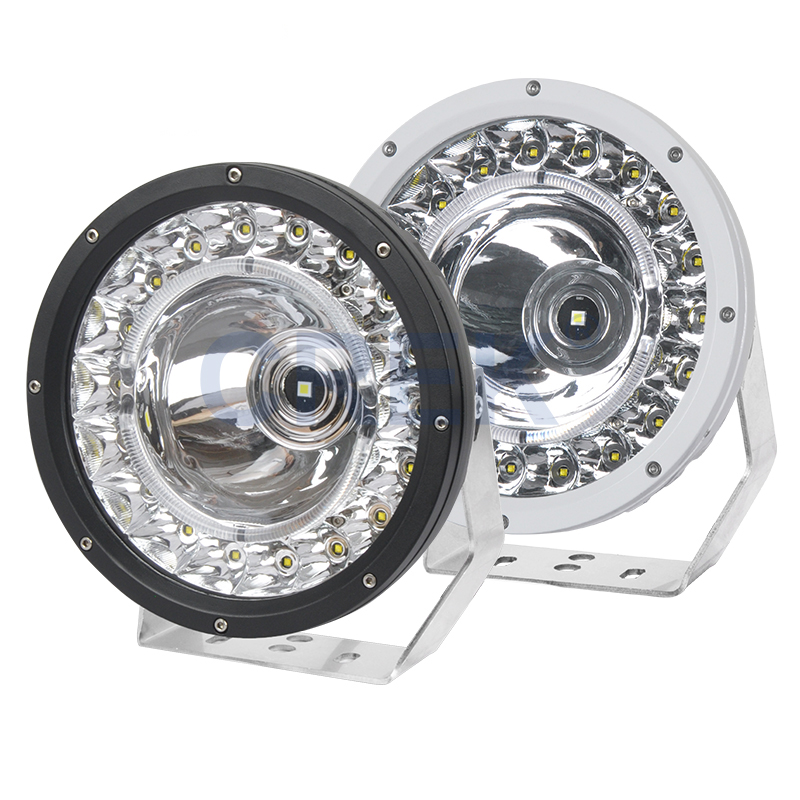
Exterior environments punish cheap materials. Look for robust cast-aluminum housings. They dissipate heat effectively, prolonging diode life. Shatterproof polycarbonate lenses protect against debris impacts. For automotive applications, environmental sealing is non-negotiable. Look for an IP67 waterproof LED flood light for offroad vehicles. The IP67 rating ensures complete dust resistance and protection against water immersion up to one meter. This prevents internal condensation and short circuits during heavy rain or river crossings.
3. Step-by-Step Residential LED Flood Light Installation
Upgrading a residential exterior light requires systematic execution. Follow these four phases strictly to ensure a secure, weatherproof connection. Always prioritize personal safety over speed.
Phase 1: Power Disconnection and Preparation
Locate your home’s main breaker panel.
Identify the specific circuit supplying power to the exterior light and switch it to the OFF position.
Remove the old fixture carefully.
Use a non-contact voltage tester on the exposed house wires. Probe the black wire to confirm zero electrical flow. Never skip this verification step.
Phase 2: Mounting the Hardware
A secure base prevents wind damage and moisture leaks. Secure the new metal mounting bracket directly to the exterior wall junction box. You must ensure the foam weather gasket sits perfectly flush against the wall. This gasket acts as the primary barrier against rainwater. If the wall texture is uneven, you might need to adjust the bracket tension slightly to achieve a uniform seal.
Phase 3: Splicing and Wiring
Connect the matching wires together. Twist the house Ground (green/bare) to the fixture Ground. Connect Neutral (white) to Neutral. Finally, connect Live (black) to Live. You must use outdoor-rated, silicone-filled wire nuts. The internal silicone sealant coats the copper strands, preventing long-term corrosion from atmospheric humidity. Push all spliced wires neatly into the junction box space.
Phase 4: Sealing and Testing
Attach the fixture canopy to the mounting bracket. Tighten the securing screws evenly. Apply a bead of exterior-grade silicone caulk around the top and sides of the base canopy where it meets the wall. Leave the bottom edge uncaulked to allow accidental moisture to weep out. Restore power at the breaker panel. Turn on the wall switch and adjust the motion sensor or lux settings to suit your yard.
4. Off-Road Vehicle Installation: Mounting High-Output LED Flood Lights
Equipping a truck or SUV for nighttime trails involves different engineering rules. DC systems demand heavy-gauge wire, dedicated relays, and careful load management to prevent battery drain.
Assessing Vehicle Load Capacity
Off-road lighting applications draw massive amounts of DC power. You must evaluate your vehicle battery and alternator output before modifying the system. Adding high-draw fixtures like a 142W LED flood driving light for 4x4 trucks requires sufficient alternator headroom. Overloading the charging system causes voltage drops, battery failure, and stalling on the trail.
Mounting Strategies
Placement determines beam performance. Different locations serve different visibility needs on the trail.
Bullbar/Bumper: This is the ideal location for an offroad truck LED spot and flood light combo. Bumper mounting provides immediate foreground illumination and cuts through fog without reflecting glare back into the driver's eyes.
Roof Rack: This offers the best vantage point for a 9 inch super bright LED flood light bar. High placement maximizes light throw over rocks and uneven terrain, casting shadows behind obstacles for better depth perception.
A-Pillar / Ditch Mounts: This spot is perfect for smaller, localized ditch lights. Mounting a compact black white LED flood beam driving light here helps illuminate trail edges and tight corners while turning.
Wiring the Relay Harness
Never wire high-wattage lights directly through a dashboard switch. They will melt the switch. You must use an isolated relay harness. Connect the primary power ring terminal to the positive battery post. Mount the relay module securely on the inner fender, keeping it away from extreme engine exhaust heat.
Next, route the small trigger wire through the vehicle’s rubber firewall grommet into the cabin. Connect this trigger wire to your chosen dashboard switch. Use heat-shrink spade connectors for all crimped joints. Secure any loose wiring slack along the engine bay using heavy-duty zip-ties. Keep wires away from moving fan blades or steering shafts.
Grounding Rules
Improper grounding ruins more off-road electrical projects than anything else. Do not daisy-chain ground wires endlessly. Always ground the negative terminal directly to bare metal on the vehicle chassis. Sand away factory paint at your chosen ground point to ensure perfect metal-to-metal contact. This prevents annoying flickering and localized electrical shorts.
5. Common Troubleshooting and Post-Installation Checks
Even meticulous installers encounter hiccups. Identifying the root cause quickly saves frustration and protects your hardware. Below is a diagnostic chart detailing common post-installation issues.
Symptom
Primary Cause
Corrective Action
Flickering or Strobing Lights
Incompatible residential dimmer switches, or a poor chassis ground on a vehicle.
Swap the residential switch to an LED-rated dimmer. For vehicles, unbolt the ground ring, sand away paint, and re-secure.
Moisture Inside the Lens
Compromised factory silicone seal or improper installation angle allowing water pooling.
Verify the fixture has a functioning breather valve. Check the IP rating documentation. Adjust mounting angle to shed water.
Tripped Breakers / Blown Fuses
Pinched wires causing a short circuit, or amp draw exceeds the fuse rating.
Inspect wiring for exposed copper touching metal. Recalculate amp draw (Watts ÷ Volts = Amps) to ensure proper fuse sizing.
A Closer Look at Electrical Overloads
Blown fuses act as intended safety mechanisms. If your automotive fuse pops immediately upon flipping the switch, you have a direct short to ground. If it pops after five minutes of driving, your fuse rating is too small for the continuous current draw. Apply the basic formula: Watts divided by Volts equals Amps. Always size your fuse 20% higher than the continuous operating load. Never insert a massive 30A fuse into a circuit designed for 10A wiring, as the wires will overheat and ignite before the fuse blows.
Conclusion
Successful LED flood light installation hinges on thorough pre-installation preparation. Evaluating the correct fixture for your specific environment ensures longevity and optimal performance. You must respect electrical loads and strictly follow standard wiring protocols to eliminate safety hazards.
Your next steps involve auditing your proposed mounting location and verifying your tool checklist. Confirm your selected fixture meets the exact IP rating and wattage requirements of your project. By adhering to these structured methods, you will achieve professional-grade results while upgrading your visibility safely.
FAQ
Q: Do I need an electrician to install an LED flood light?
A: No, if replacing an existing fixture. Swapping an old light for a new one involves basic matching of existing wires. Yes, if running new electrical circuits to the breaker panel. Running new lines requires adhering to local codes and ensuring overall panel load capacity, which demands professional expertise.
Q: What size fuse do I need for my off-road LED flood light?
A: Divide the total wattage by the voltage to find the amperage. For example, a 142W light on a 12V system draws approximately 11.8 amps. You should round up slightly for safety, requiring a 15A fuse to handle the continuous load without nuisance blowing.
Q: Why is my LED flood light glowing slightly when turned off?
A: Usually caused by residual current leaking from a smart switch or illuminated switch. LEDs require very little power to activate, so even tiny leakages cause a faint glow. Adding a bypass capacitor across the live and neutral lines at the fixture often resolves this issue completely.
Q: Can I splice an off-road LED light directly into my factory headlights?
A: It is highly discouraged. Splicing directly into factory wires alters the resistance expected by modern vehicle computers. Always use an isolated relay harness. The relay protects the factory ECU and factory wiring harness from excessive current draw and potential melting.
Shenzhen Creek Optoelectronic Technologies Co., Ltd. produce Car LED work lights, off-road LED light bar, forklift safety lights, agricultural tractor work lights, LED strobe and beacon lights, car radios, etc.