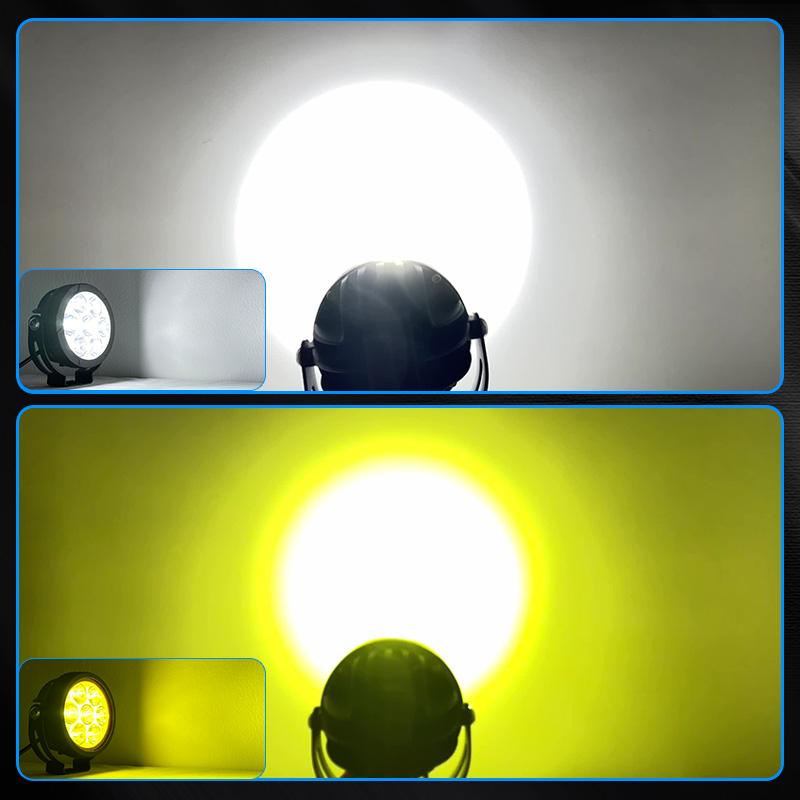
Maintaining legacy shop lighting is a constant battle. Flickering fixtures cause severe eye strain during detailed tasks. Humming magnetic ballasts create unnecessary auditory fatigue. Fragile glass tubes shatter easily in active work environments. These outdated systems drain productivity and inflate monthly utility bills. You face high energy consumption and frustratingly frequent replacement cycles. Mercury exposure risks complicate even simple disposal tasks. Poor visibility directly affects the quality of your mechanical or industrial work.
Replacing a dead fluorescent tube with another fragile bulb is only a temporary fix. You need a permanent, robust upgrade. Modernizing your workspace requires evaluating better technology. You can choose ballast-bypass retrofits to utilize existing housings. Alternatively, you can install purpose-built fixtures for superior durability. Upgrading to modern lighting solutions delivers immediate improvements in safety, visibility, and operational efficiency.
Safety First: Replacing fluorescent tubes requires strict adherence to power isolation (breaker management) and hazardous material disposal protocols due to mercury content.
Retrofit Realities: Upgrading existing fixtures to LED tubes requires choosing between Type A (Plug-and-Play, ballast dependent) and Type B (Ballast Bypass, lower maintenance) solutions.
The Heavy-Duty Advantage: For commercial garages and industrial spaces, abandoning tube fixtures entirely in favor of integrated heavy duty LED work lights eliminates glass breakage risks and ballast failures.
Long-Term ROI: While initial procurement costs for LED upgrades are higher, the elimination of ballast maintenance and a 50,000+ hour lifespan yields a rapid return on investment.
The Baseline: How to Safely Remove an Old Fluorescent Tube Light Bulb
Pre-Removal Safety and Power Isolation
Safety begins at the electrical panel, not the light switch. Wall switches only interrupt the hot wire. They do not guarantee the fixture is entirely devoid of electrical current. You must locate your main fuse box or circuit breaker panel. Identify the specific breaker controlling your overhead lighting circuit. Flip this breaker to the off position. Verify the power is disconnected using a non-contact voltage tester near the fixture housing. This prevents accidental shocks if the fixture has faulty wiring.
Personal protective equipment is mandatory when handling legacy lighting. Fluorescent tubes contain toxic mercury vapor and harmful phosphor dust. You must wear wrap-around safety glasses to protect your eyes from potential glass shards. Put on heavy-duty nitrile or leather work gloves. These gloves provide a secure grip on smooth glass and protect your skin if the tube shatters under pressure. If you are working on a ladder, ensure it is fully locked and positioned on a flat, stable surface before reaching for the ceiling.
Step-by-Step Removal Mechanics
Accessing the bulb usually requires removing a protective plastic shade or acrylic lens. Over time, heat and UV exposure make these plastic covers extremely brittle. Locate the retaining clips or sliding tracks holding the cover in place. Gently release the tension on one side. Support the center of the lens to prevent it from bowing and snapping. Carefully lower the cover and set it aside in a safe location away from foot traffic.
Standard T8 and T12 fluorescent tubes use a bi-pin connection. You must use the 90-degree twist-and-pull method for these standard fixtures. Reach up and grasp the tube firmly near both ends. Rotate the tube exactly 90 degrees in either direction. You will feel a slight click as the two metal pins align with the vertical slot in the tombstone socket. Once aligned, pull the tube straight down to release it.
Some modern or specialized fixtures use an untwistable, spring-loaded design. Do not attempt to twist these bulbs. Instead, grasp the tube and push it horizontally toward one end of the fixture. This action compresses a spring inside the socket. Once the spring is fully compressed, the opposite end of the tube will clear its socket. Lower the free end, then pull the tube out of the spring-loaded side.
Environmental factors often cause bulbs to become stuck. Moisture and dust can corrode the metal pins. Brittle plastic tombstones may warp and pinch the connection. If a bulb refuses to twist, do not force it. Apply a tiny amount of dry silicone lubricant to the socket joint. Wiggle the tube gently back and forth to break the corrosion seal. Forced twisting will shatter the glass in your hands.
Hazardous Waste Disposal Protocols
Old fluorescent tubes are classified as hazardous waste. You cannot throw them into standard commercial or residential trash bins. The mercury inside poses a severe environmental threat if it leaches into groundwater. You must follow EPA-compliant disposal guidelines. Store intact tubes in their original cardboard sleeves to prevent accidental breakage. Transport them to a designated municipal recycling center or a certified hazardous waste collection facility.
Accidental breakage requires immediate and specific clean-up procedures. If a tube shatters, evacuate the room immediately. Open all exterior windows and doors to air out the space for at least fifteen minutes. Shut off any central HVAC systems to prevent mercury vapor circulation. Never use a vacuum cleaner or broom, as these spread toxic dust into the air. Use stiff cardboard to scoop up large glass fragments. Use sticky tape to pick up fine powder and tiny shards. Place all debris into a sealable glass jar or heavy-duty plastic bag for hazardous disposal.
Evaluating Replacement Options: Fluorescent vs. LED Retrofits vs. Dedicated Fixtures
Option 1: Direct Fluorescent Replacement
Replacing a dead tube with a new fluorescent bulb offers the lowest immediate upfront material cost. You simply purchase a matching T8 or T12 tube and snap it into place. Zero wiring modifications are required. This method keeps your facility operational with minimal downtime. However, this approach guarantees future maintenance headaches. You remain entirely reliant on aging magnetic or electronic ballasts. Fluorescent technology suffers from poor cold-weather performance, often flickering endlessly in unheated garages. The fragile glass remains a significant liability in active workspaces where tools and materials are frequently moved.
Option 2: LED Tube Retrofits (Type A vs. Type B)
LED tube retrofits bridge the gap between old fixtures and new technology. Type A tubes are plug-and-play solutions. They are designed to work seamlessly with your existing fluorescent ballast. You install them exactly like a traditional tube. The primary risk is ballast dependency. When your decade-old ballast inevitably fails, the new Type A tube will stop working until the ballast is replaced. This creates a frustrating cycle of troubleshooting.
Type B tubes require a ballast bypass installation. You must physically cut the wires, remove the ballast, and wire the line voltage directly to the tombstone sockets. This method eliminates the most common failure point in overhead lighting. Type B installations require basic electrical knowledge but offer superior long-term reliability. They consume less power than Type A setups because no energy is wasted powering an obsolete ballast.
Option 3: Full Fixture Replacement with Dedicated Fixtures
Sometimes, retrofitting an old, rusted troffer is a waste of labor. The metal housing may be bent, and the tombstones may be cracked. In these scenarios, you should abandon legacy fixtures entirely. Removing the old housing allows you to install modern, integrated LED work lights. These dedicated fixtures are engineered specifically for high-performance illumination.
Dedicated fixtures establish new success criteria for your workspace. They provide exceptional impact resistance and superior lumen-per-watt efficiency. Integrated units do not rely on fragile tombstones or separate bulbs. The diodes are permanently mounted to a heat-dissipating chassis. This structural integrity makes them ideal for environments prone to vibration, dust, and accidental impacts.
Lighting Option
Installation Complexity
Ballast Dependency
Durability
Maintenance Frequency
Standard Fluorescent
Low (Twist & Pull)
Yes
Very Low (Fragile Glass)
High
Type A LED Tube
Low (Plug & Play)
Yes
Medium (Plastic Housing)
Medium (Ballast Fails)
Type B LED Tube
Medium (Rewiring Required)
No
Medium (Plastic Housing)
Low
Dedicated LED Fixture
High (Full Replacement)
No
Very High (Metal/Polycarbonate)
Very Low
Why Commercial Garages are Shifting to Heavy Duty LED Work Lights
Durability and Impact Resistance
Commercial garages are hostile environments for fragile lighting. Mechanics frequently swing long metal pry bars, maneuver exhaust pipes, and operate overhead cranes. A standard glass tube will shatter upon the slightest impact. Modern alternatives utilize extruded aluminum housings and shatterproof polycarbonate lenses. Upgrading to a heavy duty LED work light eliminates the constant fear of overhead glass breakage.
Vibration resistance is equally critical. Heavy machinery, industrial air compressors, and pneumatic impact wrenches send constant vibrations through building structures. These vibrations degrade the delicate filaments and gas seals in traditional bulbs. Solid-state lighting contains no moving parts, filaments, or loose gases. The diodes are securely soldered to circuit boards, making them entirely immune to structural vibrations.
Lumen Output and Directional Efficiency
Fluorescent tubes are inherently inefficient because they emit light in a 360-degree radius. Half of the generated light shines directly upward into the fixture housing. This requires reflective metal backings to bounce the light downward, resulting in significant lumen loss. Solid-state diodes provide targeted, 180-degree directional illumination. Every lumen produced is directed precisely where you need it—down onto your workbench or vehicle bay.
Task visibility relies heavily on the Color Rendering Index (CRI). Legacy bulbs often cast a sickly green or yellow hue, making it difficult to distinguish between wire colors or paint shades. High-quality solid-state fixtures offer a CRI above 85. This mimics natural sunlight, ensuring accurate color representation. Precision work, such as automotive wiring diagnostics or paint matching, requires this level of optical clarity.
Integration as an Automotive LED Work Light
Modern lighting solutions offer incredible mounting versatility. You are no longer restricted to ceiling-mounted troffers. Compact fixtures can be bolted directly to the arms of two-post automotive lifts. They can be integrated into mobile inspection bays or attached to heavy-duty tool carts. Utilizing an automotive LED work light ensures shadow-free illumination exactly where the mechanic is standing.
The physical footprint of legacy lighting is a major constraint. A standard four-foot fluorescent fixture is bulky and difficult to position in tight spaces. In contrast, high-output solid-state arrays pack thousands of lumens into housings only a few inches wide. This compact design allows for strategic placement under vehicle chassis, inside wheel wells, and across custom fabrication benches.
Technical Implementation: Retrofitting or Replacing Your Fixture
Tools Required and Prerequisites
Executing a successful retrofit requires a specific set of electrical tools. Do not attempt this project with makeshift equipment. You will need a reliable non-contact voltage tester to ensure circuit safety. Gather a high-quality pair of wire strippers capable of handling 18 to 12 AWG wire, lineman's pliers, and a set of insulated screwdrivers. You must also have appropriately sized wire nuts or modern lever connectors for splicing.
If you are performing a Type B ballast bypass, you must inspect the existing tombstones. Brittle, cracked, or heavily discolored sockets must be replaced. Purchase a pack of non-shunted tombstones before beginning the project. Having spare electrical tape, zip ties, and a sturdy fiberglass step ladder will ensure a smooth installation process.
Accessing the Wiring: Detaching the Metal Panel
Once the power is confirmed off and the old tubes are removed, you must access the internal wiring. Look at the center of the metal fixture housing. You will see a long metal raceway cover hiding the ballast. This cover is usually held in place by quarter-turn fasteners or small metal tabs. Pinch the tabs or turn the fasteners to release the cover. Carefully lower it to expose the wiring nest and the heavy magnetic or electronic ballast.
If you are removing the entire fixture to install brand new dedicated units, you must disconnect the main house wiring. Locate the primary wire junction where the building's electrical supply meets the fixture's wiring. Untwist the wire nuts connecting the black (hot), white (neutral), and bare/green (ground) wires. Separate the wires carefully. Cap the live house wires with wire nuts temporarily while you unbolt the old metal housing from the ceiling.
Type B Ballast Bypass: Wiring Modifications and Tombstone Evaluation
The most critical step in a Type B retrofit is understanding tombstone wiring. You must determine if your existing sockets are shunted or non-shunted. Shunted tombstones have internal connections bridging the left and right contacts. Non-shunted tombstones keep the left and right contacts electrically separate. Most Type B tubes require non-shunted tombstones to function correctly and safely. Use a digital multimeter on the continuity setting to test your sockets.
To perform the bypass, follow these exact steps:
Cut all wires leading into and out of the ballast, leaving enough wire length on the tombstone side for splicing.
Unbolt and remove the heavy ballast from the housing to reduce weight and clear space.
Strip approximately half an inch of insulation from the ends of the wires connected to the tombstones.
Connect the hot line voltage wire (usually black) to the designated hot side of the sockets.
Connect the neutral line wire (usually white) to the neutral side of the sockets.
Secure all connections tightly with wire nuts or lever connectors and tuck them neatly into the raceway.
Testing, Verification, and Compliance
Before restoring power, perform a comprehensive visual inspection. Ensure no bare copper wire is exposed outside the wire nuts. Verify that no wires are pinched between the metal raceway cover and the fixture chassis. Reattach the metal ballast cover securely. Snap the new Type B tubes into the tombstones, ensuring they are rotated into the locked position.
Compliance and future safety are paramount. You have fundamentally altered the electrical wiring of the fixture. If someone installs a traditional fluorescent tube into your bypassed fixture, it will explode. You must apply a highly visible retrofit warning label to the metal housing. This sticker clearly states that the ballast has been removed and only specific replacement tubes can be used.
Sourcing the Right Fixture: Mobile and Truck LED Work Light Solutions
Transitioning from Fixed to Mobile Lighting
Fixed overhead lighting is often insufficient for complex mechanical tasks. When working deep inside an engine bay or under a commercial trailer, overhead light is blocked by the vehicle itself. This creates dangerous, heavily shadowed work zones. Auxiliary lighting becomes a strict necessity. You need portable, high-intensity illumination that can be positioned dynamically as the job progresses.
Mobile mechanics and fleet maintenance crews require specialized equipment. Integrating a truck LED work light onto service vehicles provides massive advantages. These units can run directly off the vehicle's 12V or 24V battery system. They illuminate off-grid job sites, roadside repairs, and remote agricultural equipment maintenance. Magnetic bases and adjustable trunnion brackets allow operators to angle the beam precisely where it is needed.
IP Ratings and Environmental Compliance
Industrial and automotive environments expose lighting to severe environmental abuse. Dust from brake jobs, moisture from pressure washing, and chemical solvents from parts cleaning will destroy unsealed fixtures. You must evaluate the Ingress Protection (IP) rating before purchasing any new unit. The IP rating dictates the enclosure's resistance to solids and liquids.
An IP65 rating indicates the fixture is completely dust-tight and protected against low-pressure water jets. This is the minimum requirement for a standard commercial garage. For wash bays or exterior mobile applications, you need an IP67 rating. IP67 certified units can withstand temporary submersion in water. Choosing the correct environmental compliance ensures your investment survives the harsh realities of daily industrial use.
Maintenance Savings and Implementation Risks
Upfront Labor vs. Long-Term Maintenance Savings
Evaluating the impact of a lighting upgrade requires looking beyond the initial installation labor. Standard glass tubes demand constant attention. You must factor in the labor time spent fetching ladders, removing covers, and swapping bulbs. You must also account for the time spent replacing failed ballasts and managing the specialized disposal process for hazardous mercury.
Solid-state fixtures require a higher initial labor investment during the retrofit process. However, the maintenance savings accumulate rapidly. A quality fixture boasts a lifespan exceeding 50,000 hours of continuous operation. You eliminate ballast replacements entirely. Furthermore, the massive reduction in energy consumption directly lowers your monthly utility bills. The operational efficiency generated over the first two years typically offsets the entire effort of the initial upgrade.
Common Retrofit Failures and Mitigation
Implementation risks arise primarily from improper product selection and rushed installations. A common failure occurs when facility managers attempt to use Type A plug-and-play tubes on incompatible, outdated magnetic ballasts. This mismatch causes severe flickering, overheating, and premature diode failure. Always verify ballast compatibility charts before purchasing Type A solutions.
Type B retrofits carry electrical risks if executed poorly. Failing to replace old, brittle tombstones is a major hazard. When you wire line voltage directly to a cracked socket, electrical arcing can occur. This arcing generates intense heat, melting the plastic and potentially starting a fire. Mitigate this risk by thoroughly inspecting every socket. If the plastic is yellowed, crumbling, or loose, replace the tombstone before completing the wiring bypass.
Conclusion
Audit your current workspace lighting to identify flickering fixtures, humming ballasts, and areas with inadequate lumen output.
Inspect your existing tombstones for heat damage and order non-shunted replacements if you plan to execute a direct-wire retrofit.
Select fixtures with appropriate IP ratings (IP65 or IP67) to ensure survival in dust-heavy or moisture-prone industrial environments.
Implement strict safety protocols, including breaker lockouts and proper mercury disposal, before beginning any removal process.
FAQ
Q: Do I need to remove the ballast to use an LED tube?
A: It depends on the tube type. Type A tubes are plug-and-play and require the existing ballast to function. Type B tubes require a ballast bypass, meaning you must physically remove or disconnect the ballast and wire the power directly to the sockets.
Q: Can I use a heavy duty LED work light to replace a standard fluorescent fixture?
A: Yes. Removing the entire legacy fluorescent housing allows you to hardwire dedicated, heavy-duty fixtures. This provides superior impact resistance, better moisture sealing, and eliminates the need for fragile replacement tubes entirely.
Q: What is the difference between Type A and Type B LED replacement tubes?
A: Type A tubes work with your existing fluorescent ballast for a quick installation. Type B tubes require you to bypass the ballast and wire line voltage directly to the tombstones, offering better long-term reliability by removing the ballast failure point.
Q: How do you remove an untwistable or stuck fluorescent bulb?
A: Untwistable fixtures use a spring-loaded mechanism. Push the tube horizontally into one socket to compress the spring, then lower the opposite end. For stuck twist-style bulbs, apply dry silicone spray to the pins and wiggle gently to break the corrosion.
Q: How do I safely remove the metal ballast cover on an old fixture?
A: First, verify the power is off at the breaker. Locate the quarter-turn fasteners or pinch-tabs near the center of the metal raceway cover. Release these fasteners and carefully lower the metal panel to expose the internal wiring and ballast.
Q: Are automotive LED work lights compatible with standard 120V shop wiring?
A: Dedicated shop fixtures are designed for 120V-277V AC building power. However, mobile truck or automotive-specific auxiliary lights are usually designed for 12V or 24V DC battery power. Always verify the voltage input requirements before wiring.
Q: How do you dispose of old fluorescent tubes safely?
A: Fluorescent tubes contain toxic mercury and cannot be thrown in standard trash. Store them safely in cardboard tubes and take them to a certified municipal hazardous waste facility or a participating commercial recycling drop-off location.
Shenzhen Creek Optoelectronic Technologies Co., Ltd. produce Car LED work lights, off-road LED light bar, forklift safety lights, agricultural tractor work lights, LED strobe and beacon lights, car radios, etc.