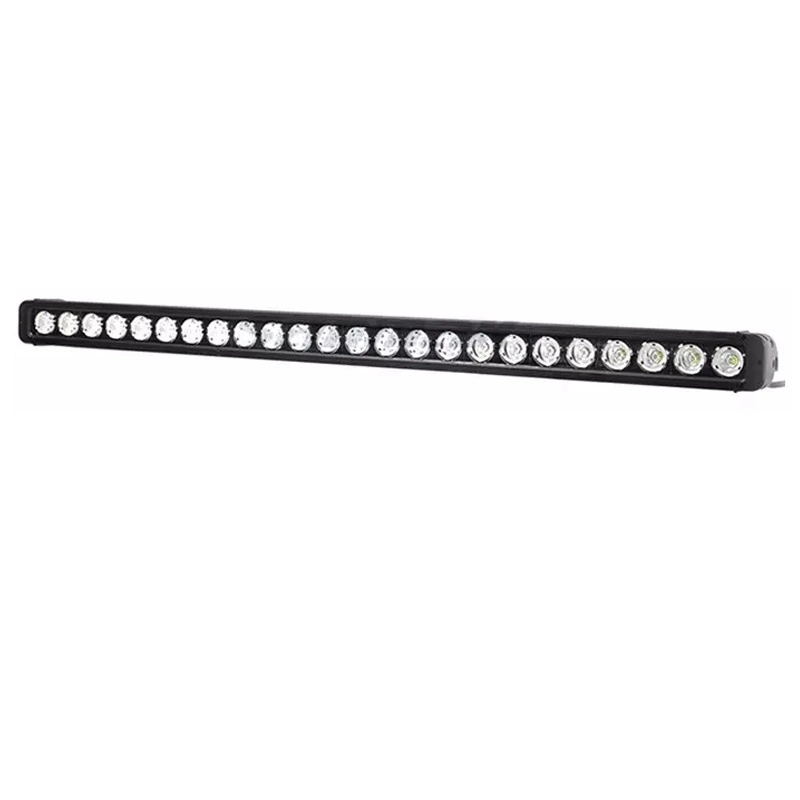
For decades, vehicle owners equated higher wattage with brighter lights. This legacy mindset creates serious risks when selecting modern auxiliary lighting. Relying solely on wattage to gauge brightness often leads to overloaded electrical systems, inadequate wire gauge sizing, and melted harnesses. Buyers frequently fall victim to inflated marketing claims, purchasing inefficient fixtures that generate excessive heat rather than usable forward light.
Consumer buying habits must shift from legacy incandescent metrics to modern solid-state lighting standards. In the past, a 100-watt halogen bulb was predictably brighter than a 55-watt version. Today, luminous efficacy dictates actual performance. A high-quality LED light bar drawing minimal power can easily outperform massive legacy arrays. We must evaluate lighting based on visible output rather than power consumption.
This evaluation framework shifts the focus from watts to actual usable light output, measured in lumens and lux. Understanding this relationship establishes a clear methodology for selecting the right fixture. You can match luminous efficacy to specific application requirements while maintaining strict electrical safety margins on your vehicle.
Watts Measure Draw, Lumens Measure Output: Wattage dictates the electrical load on a vehicle's alternator and battery, while lumens quantify the total volume of visible light emitted, directly impacting driver safety and visibility.
Luminous Efficacy is the True Differentiator: High-quality LED chips produce 80 to 120 lumens per watt, compared to a mere 15 lumens per watt for traditional halogen bulbs. Evaluating this ratio separates premium optics from inefficient, heat-generating budget alternatives.
The 7-to-1 Rule: Modern LEDs are roughly seven times more efficient than legacy lighting, meaning a lower-wattage LED can easily outperform a massive halogen array.
Raw vs. Effective Lumens: Decision-makers must discount "raw lumen" marketing numbers by 15-30% to account for thermal loss and optical inefficiencies (effective lumens).
System Compatibility: Selecting a light bar requires matching the wattage (and resulting amp draw) to the vehicle’s available electrical capacity and relay specifications.
The Core Metric Shift: Why Watts Don't Equal Brightness in an LED Light Bar
The primary goal of auxiliary lighting is maximizing forward visibility and operational safety. You need to illuminate hazards, define trail edges, and extend your reaction time at higher speeds. You must achieve this without exceeding the vehicle's electrical generation capacity. Pushing an alternator past its limit leads to voltage drops, battery drain, and eventual component failure. I have seen countless rigs stall on night runs because the owner bolted on too many lights without doing the math.
Watts strictly measure power consumption. They represent the electrical energy required to illuminate the diodes. This metric tells you how much load you place on your alternator and battery. Watts have no direct relationship to actual brightness in modern solid-state lighting. Two fixtures can draw 100 watts. If one uses cheap, inefficient chips, it converts most of that energy into heat rather than light.
Lumens define the total quantity of visible light emitted by a source. This metric impacts your safety. Higher effective lumen output translates directly to increased visibility on a dark trail or an unlit job site. When you project more lumens forward through quality optics, you identify obstacles sooner. You gain critical seconds to adjust your speed or change your line.
Luminous efficacy bridges the gap between power and output. It measures how many lumens a fixture produces per watt consumed. Traditional halogen bulbs offered a dismal 15 lumens per watt. Modern, high-quality diodes produce between 80 and 120 lumens per watt. This massive leap in efficiency birthed the "7-to-1 Rule." Modern solid-state lighting is roughly seven times more efficient than legacy halogen lighting. You can produce vastly more light using a fraction of the electrical power. This frees up your alternator for other accessories like winches or communication gear.
LED Light Bar Lumens to Wattage Output Chart
Establishing a realistic baseline prevents poor purchasing decisions. For off-road and commercial lighting, quality diodes from manufacturers like Cree or Osram average 80 to 100 effective lumens per watt. Budget fixtures often fall well below this. They sometimes hover around 50 lumens per watt due to poor thermal management and cheap lenses. The chart below uses a conservative baseline of 80 effective lumens per watt. This provides realistic expectations for system planning.
Use this data to match your lighting needs with your vehicle's electrical capabilities. The estimated amp draw assumes a standard 12-volt automotive system. Always size your wiring and relays based on the maximum potential amp draw. Add a 20% safety margin to prevent overheating.
Stated Wattage
Estimated Amp Draw (at 12V)
Legacy Halogen Equivalent
Raw Lumens (Estimated)
Effective Lumens (Realistic Output)
Recommended Wire Gauge
18W
1.5 Amps
~125W
2,160 lm
1,440 lm
16 AWG
36W
3.0 Amps
~250W
4,320 lm
2,880 lm
16 AWG
72W
6.0 Amps
~500W
8,640 lm
5,760 lm
14 AWG
120W
10.0 Amps
~840W
14,400 lm
9,600 lm
12 AWG
240W
20.0 Amps
~1,680W
28,800 lm
19,200 lm
10 AWG
Proper wire sizing prevents voltage drop. Voltage drop kills light output. If you run undersized wire, the resistance turns electrical energy into heat. Your lights run dim, and your wiring harness becomes a fire hazard. The longer the wire run from the battery to the fixture, the thicker the wire needs to be to maintain proper voltage.
Amp Draw
0-10 Feet Run
10-20 Feet Run
20-30 Feet Run
0 - 5 Amps
16 AWG
14 AWG
12 AWG
6 - 10 Amps
14 AWG
12 AWG
10 AWG
11 - 20 Amps
12 AWG
10 AWG
8 AWG
21 - 30 Amps
10 AWG
8 AWG
6 AWG
Evaluating LED Light Bars by Output and Application (Solution Categories)
Selecting the correct fixture requires matching the output profile to the specific operational environment. Over-illuminating a slow-speed trail causes visual fatigue from foreground glare. Under-illuminating a high-speed desert run leaves you outdriving your vision. Categorizing fixtures by wattage and output helps narrow down the ideal solution for your specific build.
Low-Draw Auxiliary Lighting
An 18W LED light bar typically delivers between 1,400 and 1,800 effective lumens. These compact units excel in tight spaces and applications with strict power limitations. They draw approximately 1.5 amps at 12 volts. This makes them nearly invisible to a standard automotive charging system.
Common use cases include ditch lights mounted near the A-pillars to illuminate trail edges. They serve perfectly as reverse lights, camp area illumination, or primary lighting for ATVs and motorcycles where stator output is highly restricted. When evaluating these low-draw units, prioritize compact housing dimensions and durable mounting brackets over extreme distance projection. You want broad, even light distribution up close rather than a piercing spot beam. I frequently install these on heavy equipment bumpers to light up the immediate work zone without blinding ground crews.
Mid-Range Trail Visibility
Stepping up to a 72W offroad LED light bar pushes the output into the 5,700 to 7,200 effective lumen range. This category represents the sweet spot for general off-road enthusiasts. Drawing roughly 6 amps at 12 volts, these fixtures provide substantial forward visibility without requiring dual-battery setups or high-output alternators.
These mid-range units dominate UTV forward lighting and bumper-mounted fog or driving combinations on full-size rigs. They offer the optimal balance of output-to-draw for low-speed trail navigation and overlanding. The primary evaluation dimension here is beam pattern versatility. A combination beam featuring both spot and flood optics maximizes the utility. It lights up the immediate trail while punching far enough ahead to spot upcoming turns. On job sites, we mount these on headache racks to flood the truck bed and surrounding area with usable light.
High-Output Forward Projection
For extreme applications, a 240W LED light bar delivers massive illumination, ranging from 19,200 to 24,000 effective lumens. These large fixtures turn night into day. They demand rigorous electrical planning. Pulling approximately 20 amps at 12 volts, they require heavy-duty relays, thick-gauge wiring, and a healthy alternator to prevent severe voltage drops.
High-output bars are built for roof-mounted applications, high-speed desert running, and commercial or agricultural night operations. At speeds exceeding 60 mph off-road, you need light projected hundreds of yards downrange. The evaluation dimension shifts entirely to optical control and thermal management. A 240W fixture generates significant heat. Without massive aluminum heat sinks to dissipate that thermal load, the diodes throttle down. They lose brightness within minutes of activation. I always check the weight of these bars. A heavy bar usually means thick aluminum extrusions, which translates to better cooling and sustained output.
Technical Evaluation Dimensions for Decision Makers
Navigating the technical specifications of auxiliary lighting requires a skeptical eye. Manufacturers manipulate numbers to make budget fixtures appear competitive with premium units. Understanding the underlying physics and measurement standards protects your investment and ensures your vehicle remains safe.
The Deception of Wattage in LEDs
Comparing two fixtures based on wattage alone guarantees a flawed decision. Wattage only measures input energy. The quality of the internal components dictates what happens to that energy. A premium 100W fixture utilizing top-tier diodes and highly polished reflectors vastly outshines a 150W budget fixture. The budget unit wastes its extra 50 watts generating heat due to internal resistance and poor chip design. You tax your alternator more to receive less usable light.
Raw Lumens vs. Effective Lumens (Truth in Advertising)
Marketing materials frequently blast massive lumen numbers across their packaging. These are almost always raw lumens. Manufacturers calculate raw lumens by taking the maximum theoretical output of a single diode in a laboratory setting and multiplying it by the total number of diodes in the fixture. This calculation ignores real-world physics.
Effective lumens represent the actual measured output after the light passes through the polycarbonate lens and bounces off the reflectors. It accounts for thermal loss as the fixture heats up during operation. You must discount raw lumen claims by 15% to 30% to find the effective output. Effective lumens are the only metric that matters for purchasing decisions. They represent the light that actually hits the dirt.
Lux and Beam Patterns (Features-to-Outcomes)
Lumens measure total volume, but they do not tell you where that light goes. A bare bulb hanging from a ceiling might produce 10,000 lumens, but it scatters that light in 360 degrees. You need directional intensity. This is where Lux comes into play.
Lux measures light intensity at a specific distance (lumens per square meter). A high-lumen flood light scatters energy wide, resulting in low lux at 100 yards. A lower-lumen spot light focuses its energy into a tight beam, resulting in high lux at 100 yards. You must match the beam pattern to your speed. Fast driving requires high lux (spot beams) to see far ahead. Slow rock crawling requires broad lumen distribution (flood beams) to see immediate obstacles.
Beam Pattern
Angle Spread
Primary Application
Mounting Location
Spot
10° - 20°
High-speed driving, long-distance visibility
Roof rack, upper grille
Flood
40° - 60°
Slow-speed crawling, wide peripheral vision
Lower bumper, ditch brackets
Combo
Mixed
General off-road use, versatile illumination
Front bumper, bull bar
Scene
120°
Camp setup, job site work area lighting
Side roof rack, rear bumper
Electrical System Constraints (Scalability & Compliance)
Every accessory you add consumes a portion of your alternator's finite output. Exceeding this capacity drains the battery while the engine runs, eventually stalling the vehicle. You calculate the amp draw for every planned fixture using a simple formula: Watts ÷ Voltage = Amps.
Check your vehicle's factory alternator rating.
Estimate the base vehicle load with headlights, HVAC, and radio running.
Calculate the remaining overhead available for accessories.
Ensure your combined lighting, winch, and compressor loads do not exceed this overhead during simultaneous operation.
Wiring high-draw accessories directly to a switch inside the cab is a recipe for disaster. Switches are rarely rated for more than a few amps. You must use a relay. A relay acts as a heavy-duty remote switch. The low-amp switch in your cab triggers the relay under the hood. The relay then sends high-amp battery power directly to the lights over short, thick wire runs.
Mount the relay close to the battery to keep the high-current power wire as short as possible.
Run a fused power wire from the positive battery terminal to pin 30 on the relay.
Connect pin 87 on the relay to the positive wire of your lighting fixture.
Ground pin 85 to the chassis or negative battery terminal.
Run a trigger wire from your cab switch to pin 86 on the relay.
Implementation Risks and Mitigation Strategies
Installing high-powered lighting introduces specific physical and electrical risks to your vehicle. Ignoring these risks leads to premature equipment failure, poor performance, and potential fire hazards. Proper installation requires attention to thermal dynamics and electrical theory.
Thermal Throttling in High-Wattage Bars
Diodes despise heat. As junction temperatures rise, light output falls. Cheap, high-wattage fixtures lack the necessary aluminum mass and fin design to shed heat effectively. When these units overheat, built-in thermal protection circuits reduce the power to save the diodes. This is known as thermal throttling. Your 20,000-lumen light bar drops to 10,000 lumens after twenty minutes of driving. Mitigate this by purchasing fixtures with heavy, extruded aluminum housings and deep cooling fins.
Voltage Drop and Wiring Failures
Pushing 20 amps through an undersized wire creates massive resistance. This resistance manifests as heat, which melts insulation and causes electrical fires. Resistance causes voltage drop. If your battery outputs 12.6 volts, but undersized wiring drops that to 10.5 volts by the time it reaches the roof-mounted fixture, your light output plummets. Always use the appropriate wire gauge. Use 10 AWG for 20-amp loads over long runs, 12 AWG for 10-amp loads, and 14 AWG for 5-amp loads.
Never rely on cheap twist-on wire connectors or electrical tape for exterior automotive wiring. The vibrations from off-road driving will shake them loose, and moisture will corrode the exposed copper. Always use uninsulated butt connectors, crimp them tightly with a ratcheting tool, and seal the connection with marine-grade, adhesive-lined heat shrink tubing. When routing wires through the firewall into the cab, you must use a rubber grommet to prevent the sharp sheet metal from slicing through the wire insulation and causing a dead short.
Navigating Exaggerated Marketing Claims
The auxiliary lighting market is flooded with impossible specifications. Equip yourself with a skeptical lens. If a manufacturer claims a 100W fixture produces 100,000 lumens, reject it immediately. This violates the laws of physics for current solid-state technology. It implies an impossible 1,000 lumens per watt. Stick to the 80-120 lumens per watt baseline to identify fake specifications and avoid wasting money on counterfeit performance.
Conclusion
Audit your vehicle's factory alternator output to determine the exact amperage overhead available for new auxiliary lighting.
Calculate the total amp draw of your planned lighting setup using the Watts ÷ Voltage = Amps formula to ensure it falls safely within your electrical limits.
Select the appropriate wire gauge and relay size based on the maximum amp draw of your chosen fixtures to prevent voltage drop and overheating.
Evaluate your typical driving speeds and environments to choose the correct beam pattern, prioritizing spot beams for high speeds and flood beams for technical trails.
FAQ
Q: How many lumens is a good LED light bar?
A: The ideal lumen count depends on your application. For slow-speed rock crawling or tight wooded trails, 3,000 to 5,000 effective lumens provide excellent immediate visibility without blinding glare. For high-speed desert driving or wide-open agricultural work, you need 15,000 or more effective lumens paired with spot optics to project light far enough downrange to match your stopping distance.
Q: What is the 7-to-1 rule for LED lighting?
A: The 7-to-1 rule highlights the massive efficiency gap between modern solid-state lighting and legacy incandescent bulbs. Modern diodes are roughly seven times more efficient than traditional halogen bulbs. A halogen bulb produces about 15 lumens per watt. A high-quality modern diode produces 80 to 120 lumens per watt, delivering vastly more light for the same electrical draw.
Q: How many amps does a 240W LED light bar draw?
A: To find the amp draw, divide the wattage by your vehicle's voltage. A 240W fixture divided by a standard 12V system equals exactly 20 amps. Because automotive voltage fluctuates, you must plan for this maximum draw. Safely running a 20-amp load requires a dedicated 30-amp relay, a 25-amp inline fuse, and a minimum of 10 AWG wiring.
Q: Are higher watt LED light bars always brighter?
A: No. Wattage strictly measures electrical power consumed, not light produced. Inefficient high-wattage fixtures convert excess power into heat rather than usable light. A highly efficient 100W premium fixture using top-tier diodes and optimized reflectors easily outshines a poorly designed 150W budget fixture. Wattage is a deceiving metric when evaluating actual brightness.
Q: What is the difference between raw and effective lumens?
A: Raw lumens represent a theoretical maximum. Manufacturers calculate this by multiplying the peak output of one diode by the total number of diodes, ignoring real-world physics. Effective lumens represent the actual, measurable light output after accounting for thermal degradation, lens diffusion, and reflector inefficiency. Effective lumens are typically 15% to 30% lower than raw claims.
Q: Why does my 72W offroad LED light bar seem dimmer than a lower wattage one?
A: This usually stems from poor optical design or severe thermal throttling. If the reflectors fail to focus the light properly, the energy scatters, reducing forward intensity. If the fixture lacks adequate heat sinks, the internal temperature spikes rapidly. The circuitry automatically reduces power to the diodes to prevent melting, causing the light to dim significantly.
Q: How do I convert LED watts to lumens?
A: You cannot make an exact conversion because efficiency varies by manufacturer. You can estimate output using the industry baseline. Multiply the stated wattage by 80 to 100 to find the estimated effective lumens for a quality fixture. For example, a 50W fixture multiplied by 90 lumens per watt yields an estimated 4,500 effective lumens.
Shenzhen Creek Optoelectronic Technologies Co., Ltd. produce Car LED work lights, off-road LED light bar, forklift safety lights, agricultural tractor work lights, LED strobe and beacon lights, car radios, etc.