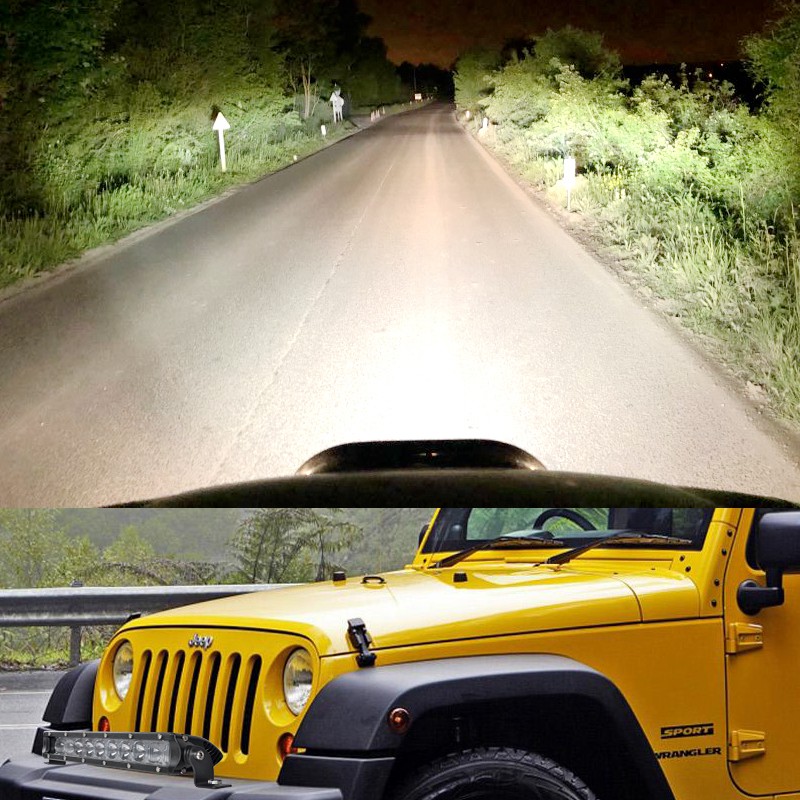
Driving off-road or on rural routes at night presents severe visibility challenges. Standard factory headlights often fail to illuminate the peripheral zones where wildlife, deep ditches, and trail drop-offs hide. You need a lighting solution that pushes usable lumens wide without creating a blinding hot spot directly in front of your truck. Many truck owners install auxiliary lighting only to face unexpected failures. Improper sizing and poor selection lead to mismatched truck contours, deafening wind noise at highway speeds, blinding hood glare, premature moisture ingress, and wasted electrical draw that strains the alternator. This guide provides a technical framework for evaluating and selecting the exact light bar size, build quality, and configuration based on truck dimensions, mounting locations, and intended use cases. We break down how to bypass common installation traps and secure a lighting setup that delivers reliable, wide-angle visibility.
Curved profiles offer superior peripheral illumination and aerodynamic contour matching compared to straight bars, but require precise measurement of the mounting surface radius.
A 20 inch curved LED light bar is optimal for localized, low-glare mounting on bull bars, lower bumpers, or hidden grille applications.
A 32 inch curved LED light bar provides the ideal balance for mid-size truck roof racks or full-size truck hidden bumper mounts without overwhelming the electrical system.
A 50 inch curved LED light bar maximizes forward and peripheral output for full-size trucks but requires specialized anti-glare mitigation and heavy-duty windshield brackets.
Beyond size, evaluating IP ratings, single vs. dual-row profiles, and color temperature is essential for long-term durability and usable light output.
Success Criteria: Why Specify a Curved LED Light Bar?
Choosing a curved Led light bar over a traditional straight housing changes how light interacts with the environment and how the hardware mounts to your vehicle. The curved design solves specific physical and optical limitations found in straight bars. When you spend hours navigating tight trails or open desert at night, the shape of your lighting equipment dictates your field of view.
Aerodynamic Contour Matching
Modern truck cabs and front bumpers feature distinct sweeping radii. A straight metal bar bolted across a curved windshield creates a massive aerodynamic disruption. Air slams into the flat face, creating turbulence that drags on the vehicle and generates excessive noise. The radius of a curved housing naturally aligns with the contour of modern windshields and front fascias. This alignment allows air to slip over and around the housing more efficiently. By matching the vehicle's natural lines, you reduce the drag coefficient and minimize the wind resistance that typically plagues roof-mounted accessories. You will notice a significant reduction in drag when driving at highway speeds compared to running a flat bar.
Peripheral Illumination and Light Spread
The physics of a curved housing dictate its primary advantage: superior field of view. On a straight bar, all LED chips face dead ahead. To get wide light, manufacturers rely heavily on aggressively textured flood reflectors, which scatter light and reduce overall distance. A curved housing physically angles the outer LED banks outward. This mechanical angle pushes the beam pattern into the ditches and tree lines without sacrificing the focused intensity of the center spot beams. You gain early hazard detection for wildlife and trail edges because the light physically wraps around the front of the vehicle. This wide spread proves invaluable when cornering on tight switchbacks where straight lights only illuminate the trees directly in front of you.
Aesthetic Integration
A well-built truck should look purposeful. Straight bars often look bolted-on, breaking the fluid lines designed by automotive engineers. A curved profile integrates cleanly into the factory lines of the vehicle. When mounted flush against a curved bumper or tucked tightly above the windshield glass, the hardware looks like a factory option rather than an aftermarket afterthought. This seamless integration maintains the aggressive, clean look of the truck while delivering massive utility. Builders and fabricators prefer curved housings because they require less custom fabrication to make them look natural on modern rounded front ends.
Sizing Framework: Matching Dimensions to Truck Mounting Points
Size dictates placement, and placement dictates performance. Forcing a massive light bar into the wrong location guarantees poor performance and installation headaches. You must match the physical dimensions of the bar to the structural mounting points of your specific truck. We see many owners buy the largest light possible, only to realize it blocks airflow or creates severe glare.
The 20 Inch Curved LED Light Bar: Bumper and Bull Bar Applications
A 20 inch curved LED light bar serves as the workhorse for localized, low-glare lighting. It fits cleanly into lower bumper openings, mounts easily to aftermarket bull bars, and tucks behind the grilles of both mid-size and full-size trucks. This size is highly versatile and rarely requires custom fabrication.
From a performance standpoint, mounting a light low to the ground excels at fog penetration and immediate foreground lighting. It supplements factory high beams by filling in the dark void directly in front of the tires. Because it sits below the hood line, you face zero risk of hood glare blinding you from the driver's seat. You can run this light in dusty conditions without blinding yourself with reflected light.
Implementation remains straightforward. A 20-inch unit draws significantly less amperage than larger models. You can often wire it using standard harnesses without upgrading your alternator or running heavy-gauge wire long distances. You rarely need to drill into the cab, keeping the installation clean and reversible. Most aftermarket bumpers come pre-drilled with 20-inch mounting slots, making this a simple bolt-on upgrade.
The 32 Inch Curved LED Light Bar: Grille and Mid-Size Roof Mounts
When you need more output than a bumper light but lack the space for a full windshield mount, a 32 inch curved LED light bar hits the sweet spot. This size fits perfectly behind the upper grille of full-size trucks like the F-150 or Silverado. It also serves as an excellent roof rack or upper bumper light for mid-size trucks like the Tacoma or Colorado, as well as UTVs.
This dimension delivers a balanced combination of distance and width. It houses enough LED chips to throw a penetrating spot beam down the trail while utilizing the curved ends to cast a wide flood pattern. It provides serious illumination without dominating the vehicle's front profile. For many drivers, this is the only auxiliary light they will ever need.
If you plan a hidden grille mount, you must measure carefully. The curve pushes the center of the bar deeper into the engine bay than a straight bar, so depth clearance is critical. Follow these steps to verify fitment before ordering:
Remove the factory plastic radiator cover to access the core support.
Measure the distance between the solid steel vertical uprights to ensure a 32-inch housing will fit horizontally.
Check the depth from the back of the grille mesh to the front of the air conditioning condenser.
Verify clearance around the hood latch mechanism when fully engaged.
Ensure the housing will not block the active grille shutters found on newer truck models.
The 50 Inch Curved LED Light Bar: Full-Size Windshield and Roof Rack Installations
For high-speed off-road driving in wide-open spaces, nothing beats a 50 inch curved LED light bar. Designed specifically for upper windshield mounts or full-width roof racks on full-size and heavy-duty trucks, this size maximizes raw lumen output. You mount this high up to cast light as far down the trail as possible.
The performance profile is massive. It provides daylight-level visibility across a huge field of view. The wide radius perfectly matches the roofline of full-size cabs, pushing light far down the trail and deep into the surrounding landscape. This is the setup you need when outrunning your headlights is a genuine risk during high-speed desert runs.
However, implementation carries heavy realities. A 50-inch roof mount creates a high risk of wind noise and hood glare. You cannot use generic mounts. You must source vehicle-specific, heavy-gauge steel brackets designed for your exact make and model. Furthermore, these high-output bars draw massive amperage. You must carefully route heavy-gauge wiring down the A-pillar weather stripping and ensure your electrical system can sustain the load without draining the battery.
Technical Evaluation: Features to Outcomes
Selecting the right size is only the first step. The internal components, housing materials, and optical designs dictate whether the light survives its first rainstorm and whether the light it produces is actually usable from the driver's seat. Off-road environments destroy cheap lighting equipment quickly.
Single-Row vs. Dual-Row Configurations
The physical profile of the housing impacts both output and fitment. You must evaluate the space you have available against the light output you demand. Single-row and dual-row bars serve different purposes based on mounting constraints.
Heavy-duty bumpers, full-size roof mounts requiring maximum output.
Single-row bars produce a highly focused beam and create significantly less aerodynamic drag. They are the preferred choice for modern, low-profile builds. Dual-row bars stack two rows of LEDs, effectively doubling the chip count in the same horizontal space. They deliver maximum raw lumen output and superior flood capabilities but weigh considerably more and require robust mounting solutions.
Beam Patterns: Spot, Flood, and Combo Configurations
LED chips alone do not direct light; the reflectors and lenses do. Choosing the right beam pattern determines where the light actually lands on the trail. A poorly designed optic will scatter light uselessly into the sky.
Spot Beam: Utilizes deep, smooth parabolic reflectors to focus light into a tight, intense beam. Ideal for high-speed, long-distance visibility. These are typically positioned in the center of the housing.
Flood Beam: Uses textured or wide-angle optics to scatter light over a broad area. Ideal for low-speed, wide-angle trail illumination. These are typically positioned on the outer edges of the curve.
Combo Beam: The standard and most effective configuration for curved bars. It places spot optics in the center for distance and flood optics on the curved ends. The physical curve maximizes the spread of the flood reflectors while maintaining center spot intensity.
Durability Metrics: IP Ratings and Housing Materials
Off-road lighting lives in a brutal environment of vibration, moisture, and impact. You must verify the durability metrics before installation. Water ingress is the number one cause of light bar failure.
Ingress Protection (IP) ratings define how well the housing seals out dust and water. An IP67 rating means the light can survive temporary submersion up to one meter. While adequate for light use, serious off-roaders should demand IP68 or IP69K ratings, which guarantee protection against continuous submersion and high-pressure washing. If you cross deep water or pressure wash your truck frequently, IP67 will eventually fail.
Moisture management goes beyond rubber seals. Temperature fluctuations cause the air inside the housing to expand and contract, which can draw moisture past the seals and cause condensation on the inside of the lens. Look for military-style breather valves. These Gore-Tex patches allow the housing to equalize air pressure while blocking liquid water, keeping the lens clear.
For construction, insist on extruded aluminum housings. Aluminum acts as a massive heat sink, pulling damaging heat away from the LED chips to prolong their lifespan. Ensure the lens is made of shatterproof polycarbonate, which withstands rock strikes far better than standard glass or cheap acrylic.
Light Quality: Color Temperature and Usable Light
Do not buy a light based solely on raw lumen claims. Raw lumens represent the theoretical maximum output of the LED chips in a laboratory. Lux is the metric that matters. Lux measures the actual usable light reaching a specific target at a specific distance. A well-designed optic pushing 10,000 raw lumens will outperform a poorly designed optic pushing 20,000 raw lumens because it puts the light exactly where you need it.
Color temperature heavily impacts driver fatigue. Many cheap lights push a harsh, blue-tinted 6500K+ light. This blue light scatters heavily in dust and strains the eyes during long drives. We recommend the 5000K-6000K range. This spectrum mimics natural daylight, providing crisp contrast and reducing eye fatigue. If you frequently drive in heavy dust, snow, or fog, consider amber options around 3000K, as the longer wavelength cuts through airborne particles rather than reflecting back at you.
Electrical Draw and Alternator Load Management
Adding high-output lighting places a massive burden on your truck's electrical system. You must calculate the total amp draw to ensure your alternator and battery can handle the load. Use the simple formula: Watts divided by Volts equals Amps. A 300-watt light running on a 12-volt system draws 25 amps. If you run multiple accessories simultaneously, you can easily exceed your factory alternator's capacity.
Light Bar Size
Estimated Wattage
Estimated Amp Draw (12V)
Recommended Relay Size
Recommended Wire Gauge
20 Inch
100W - 120W
8.3A - 10A
40A
14 AWG
32 Inch
150W - 180W
12.5A - 15A
40A
12 AWG
50 Inch
250W - 300W+
20.8A - 25A+
60A or Dual 40A
10 AWG
Proper wiring harnesses are non-negotiable. You must use appropriate AWG wire sized for the distance and the current. Always install inline fuses close to the battery to protect against shorts. High-capacity relays are required to switch the heavy current, keeping the dangerous amperage out of the cab and away from your dashboard switches. Never wire a high-output light directly to a toggle switch without a relay.
Implementation Risks and Mitigation Strategies
Even the highest quality lighting equipment will cause frustration if installed incorrectly. Anticipating and mitigating these common implementation risks ensures a clean, functional setup. We see the same mistakes made repeatedly in home garages.
Mitigating Wind Noise and Harmonic Vibrations
Air passing over the deep cooling fins of large roof-mounted bars creates turbulence. At highway speeds, this turbulence can induce a high-pitched whistle or a deep harmonic vibration that resonates through the roof of the cab. This noise can quickly make highway driving unbearable.
You can solve this in several ways. Rubber vibration dampeners installed between the bracket and the housing absorb the harmonic resonance. Adjusting the pitch angle slightly downward changes how the air strikes the fins, often eliminating the whistle. For persistent noise, inserting automotive rubber door trim into the gaps of the rear cooling fins breaks up the airflow and stops the whistling entirely. Some manufacturers also sell aerodynamic covers that snap over the fins.
Preventing Hood Glare on Roof Mounts
When you mount a massive light above the windshield, the lower edge of the flood beam often spills onto the hood. On light-colored trucks, this light reflects directly back into the driver's eyes, destroying night vision and rendering the light bar useless. You end up seeing your own hood better than the trail.
To prevent hood glare, mount the bar as far back on the roof line as the brackets allow, using the roof itself to shadow the hood. You can also install aftermarket glare shields that bolt to the bottom of the housing to cut off the downward light spill. If repositioning isn't possible, wrapping the truck hood in matte black vinyl absorbs the stray light and eliminates the reflection completely.
Hardware Security and Anti-Theft Measures
High-end lighting equipment is a prime target for theft. Externally mounted bars on bumpers or windshields are easily accessible to anyone with a standard Allen wrench or socket set. A thief can strip a bumper light in under two minutes.
Do not rely on the standard stainless steel hardware included in the box. Replace the primary mounting bolts with tamper-proof security nuts and specialized locking bolts that require a proprietary keyed socket to remove. Adding a drop of red threadlocker also deters quick theft while keeping the mounts secure against off-road vibrations.
Legal Compliance and On-Road Restrictions
You must understand the legal restrictions regarding auxiliary lighting. Most high-output curved light bars are strictly designated for off-road use. They are not DOT or SAE approved for use on public highways. Activating a 30,000-lumen light bar in oncoming traffic is incredibly dangerous and highly illegal.
Many jurisdictions enforce strict cover laws. In these areas, any auxiliary lighting mounted above the factory headlights must be covered with an opaque material when the vehicle is driven on public roads. Always check your local and state regulations before mounting external lighting to avoid costly fines. Keep snap-on covers in your truck bed for highway transit.
Conclusion
Measure your intended mounting surface with a flexible tape measure to account for the specific radius of your bumper or roofline.
Calculate your total accessory amperage draw and verify your factory alternator has the overhead capacity to support the new load.
Source vehicle-specific, heavy-gauge steel mounting brackets designed for your exact truck model to prevent vibration and metal fatigue.
Install a dedicated wiring harness with an inline fuse and a high-capacity relay to keep heavy electrical current out of the cab.
FAQ
Q: How do I measure my truck for a curved LED light bar?
A: Do not measure along the curve of the bumper. Measure point-to-point in a straight line between your intended mounting bracket locations. The size of the light bar refers to the straight-line distance from mounting point to mounting point, not the total length of the curved housing.
Q: Should I choose a single-row or dual-row curved light bar?
A: Choose a single-row for low-profile mounts like hidden grilles where vertical space is tight and aerodynamic drag is a concern. Choose a dual-row when you have ample mounting space and require maximum raw lumen output and superior flood capabilities.
Q: Will a 50 inch curved LED light bar fit a mid-size truck like a Tacoma?
A: Generally, no. A 50-inch bar will overhang the roofline of most mid-size trucks, looking awkward and creating severe snag hazards on trails. For mid-size windshields, a 40-inch or 42-inch curved bar provides the correct width to match the cab's dimensions.
Q: Do curved light bars require different mounting brackets than straight bars?
A: Yes. Because the mounting points on a curved bar sit at a different angle than a straight bar, you need curve-specific or highly adjustable brackets. Using straight brackets on a curved bar causes binding, which strips the aluminum threads and weakens the mount.
Q: Can I mount a curved light bar behind my grille?
A: Yes, but you must measure depth clearance carefully. The center of a curved bar pushes deeper into the engine bay. Ensure it does not block radiator airflow, interfere with the hood latch, or obstruct active grille shutters found on newer trucks.
Q: How do I stop my curved light bar from whistling at highway speeds?
A: Wind noise is caused by air vibrating across the cooling fins. You can stop it by adjusting the pitch angle slightly downward, installing rubber vibration dampeners on the brackets, or wedging automotive rubber door trim into the rear fins to break up the airflow.
Q: How do I fix moisture inside my curved LED light bar?
A: If your light has a breather valve, turn the light on for a few hours in a dry environment; the heat will push the moisture out through the Gore-Tex patch. If it lacks a valve, you must remove the lens, dry the interior completely, and reseal it with high-quality marine silicone.
Shenzhen Creek Optoelectronic Technologies Co., Ltd. produce Car LED work lights, off-road LED light bar, forklift safety lights, agricultural tractor work lights, LED strobe and beacon lights, car radios, etc.